Content Blocks
Content blocks are structured sections that appear on each product, experience, or store-item detail page in your booking widget. Instead of one long paragraph, you can break information into the sections your customers actually look for — What's Included, What's Not Included, Itinerary, Highlights, Check-in details, What to Bring, Restrictions, Health & Safety, and Cancellation notes.
Every empty block hides automatically on the widget, so you only ever show the sections you've filled in.
The Built-in Blocks
| Block | Use it for | Appears on |
|---|---|---|
| What's Included | Gear, instruction, refreshments, photos — anything bundled in the price | Experiences, Rentals, Store items |
| What's Not Included | Meals, gratuities, transport, insurance — anything a customer must arrange or pay for themselves | Experiences, Rentals |
| Itinerary | Time-stamped schedule for multi-hour experiences | Experiences, Rentals |
| Highlights | Three to six short marketing bullet points | Experiences, Rentals, Store items |
| Check-in details | Meeting point, arrival time, how to find you | Experiences, Rentals |
| What to Bring | Clothing, ID, sunscreen, swimwear | Experiences, Rentals |
| Restrictions | Age / weight / medical / experience level rules | Experiences, Rentals |
| Health & Safety | Certifications, safety briefing, insurance | Experiences, Rentals, Store items |
| Cancellation notes | A short plain-English summary to sit alongside your policy | Experiences, Rentals, Store items |
What's Not Included sits directly beneath What's Included everywhere it appears, so customers see what they get and what they don't side by side. On the widget its items show with a red ✗ (versus the green ✓ on What's Included).
Where to Edit Content Blocks
Content blocks live in the Additional customer information panel of every experience / rental product / store product form.
- Go to Experiences → pick an experience → open Additional customer information.
- (Or Rentals → Products → pick a product → Additional customer information.)
- (Or Store → Products → pick a product → Additional customer information.)
Every section starts collapsed, so the editor stays tidy and you only open what you want to work on. Each collapsed row shows a one-line summary of what's inside it.
- Click a section's header (or the chevron on its right) to expand it and start editing.
- Click the header again to collapse it back down.
- Turn a built-in section on or off with the switch on its right — only the ones you switch on show to customers.
Filling in a Block
Each block type has its own editor shape:
- What's Included / What's Not Included — a repeater. Click + Add item, type a short item name and an optional one-line description. Add as many items as you like; remove one with the trash icon.
- What to Bring / Highlights — a chip list. Type a short label, press Enter to add it. Drag to reorder, click the × to remove.
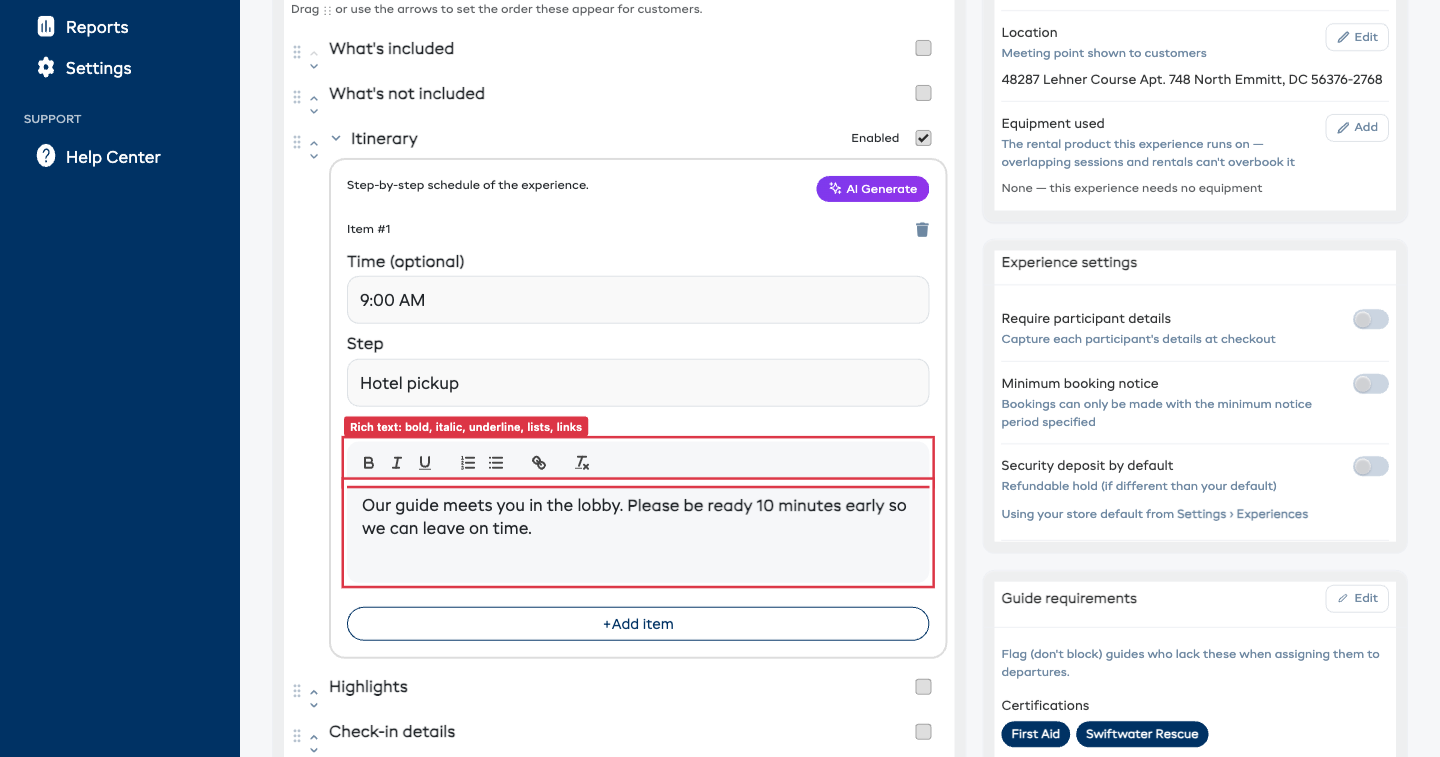
- Itinerary — a repeater. Add a row, then fill in a Time (e.g.
09:00), a short Step title, and a Description. The Itinerary Description is now a full rich text editor — add bold, italic, and underline text, bulleted or numbered lists, and links, the same as your custom sections. Add as many rows as you like. - Check-in details / Restrictions / Health & Safety / Cancellation notes — a rich text editor, the same one as Full description. Use the toolbar to add bold, italic, and underline text, bulleted or numbered lists, and links. Your formatting shows through to the widget exactly as you set it.
The form saves automatically as you type.
Put the Sections in Any Order
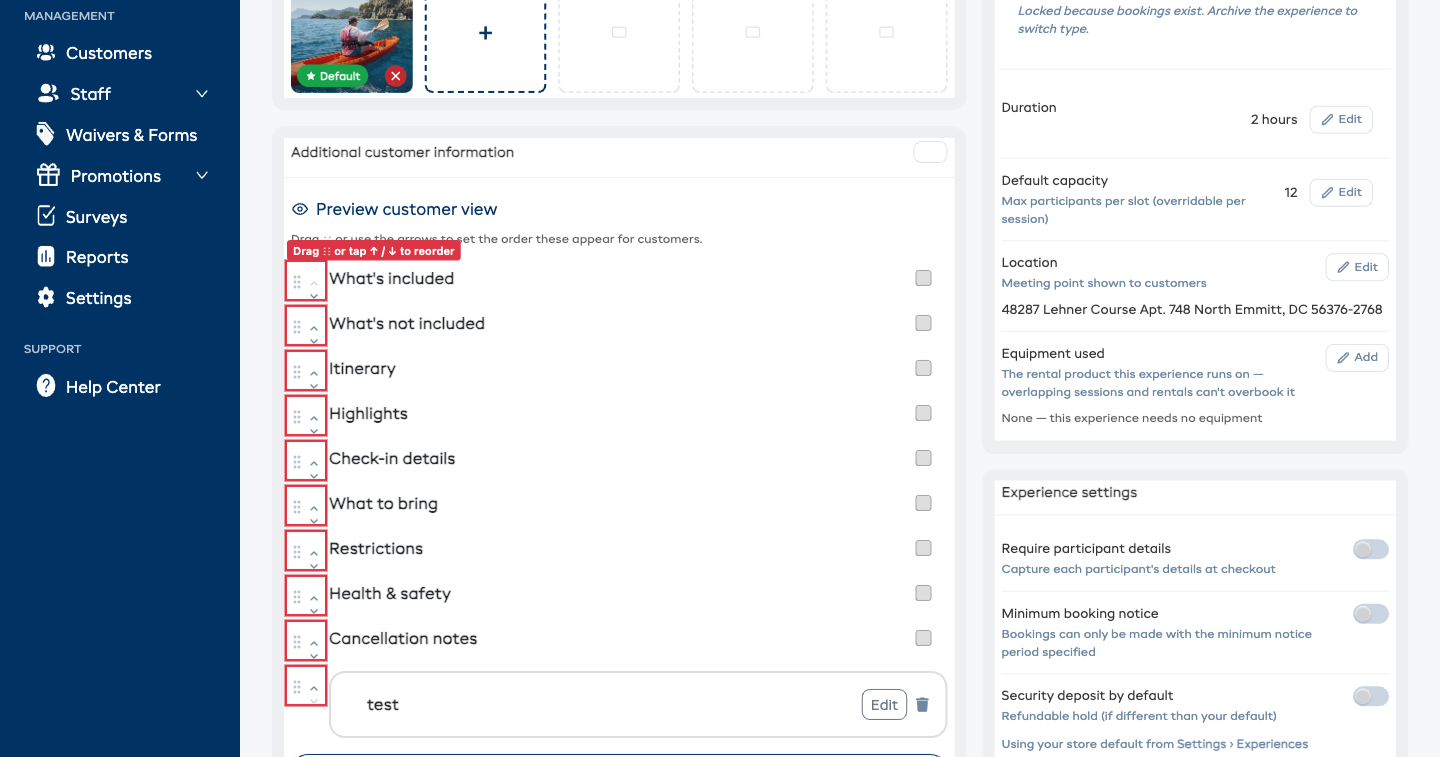
You decide the order your sections appear in — both the built-in blocks and your own custom sections sit in one list, and you can rearrange the whole list however you like.
- Drag the handle (the ⋮⋮ grip on the left of each row) up or down to move a section.
- Or use the small up / down arrows next to the handle — handy on a phone or tablet.
The order you set here is the order customers see on the booking widget and in your confirmation emails. Set it once per product or experience and it sticks.
Add Your Own Sections
The built-in blocks cover most needs, but you can add as many extra sections of your own as you like — a parking guide, a "good to know" note, directions, a gear-care reminder, anything.
Your own sections live in the same Additional customer information list as the built-in blocks, so you can place them anywhere in the order — not just at the bottom.
- Open an experience or rental product and expand Additional customer information.
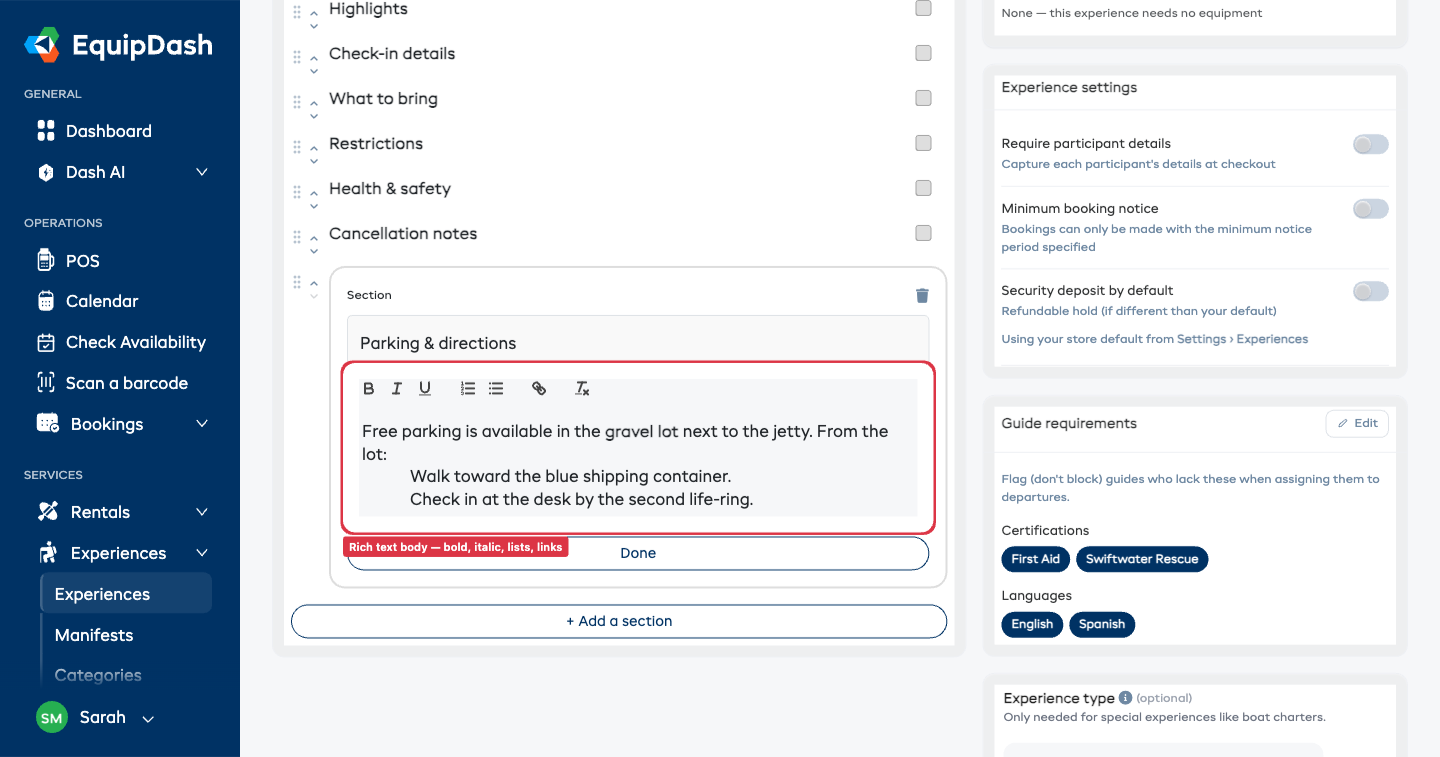
- Click + Add a section at the bottom of the list.
- Type a heading (e.g. Parking & directions).
- Write the body in the rich text editor — bold, italic, underline, lists, and links all work here too.
- Click Done to save the section.
A saved section collapses to just its heading — click the heading to expand and read it, or click Edit to change the fields (the trash icon removes it). Drag it (or use the up / down arrows) to sit wherever you want among the other sections. Add as many as you like with + Add a section.
Your own sections appear on the widget and confirmation emails in the position you've dragged them to, each as its own collapsible card. A section with a blank heading and blank body is simply ignored.
Rename the Section Headings
The built-in headings — Highlights, What's included, Check-in details, and so on — use names that work for most shops. If your business uses different words, you can rename any of them once and have the new name show on every product and experience.
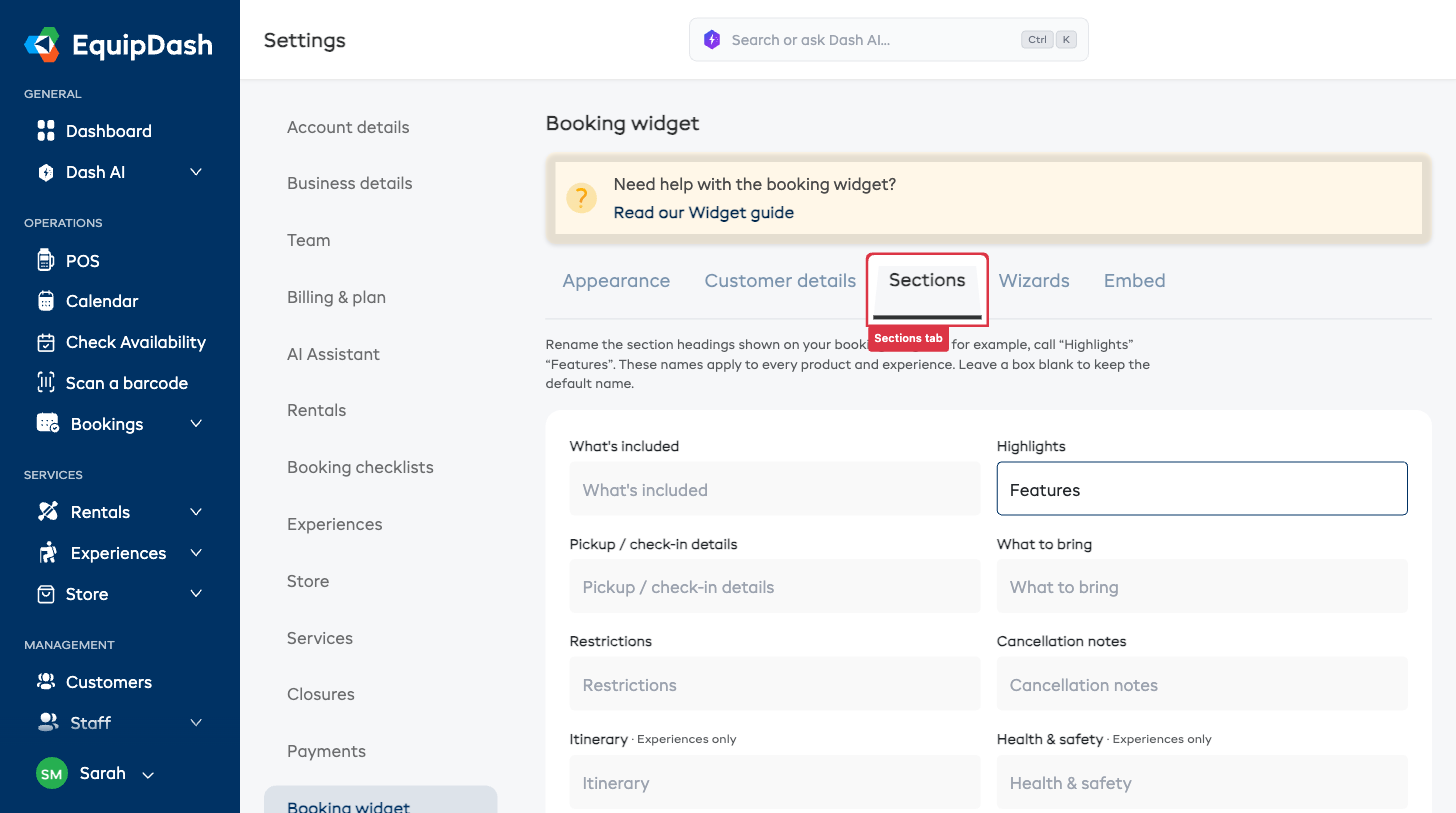
- Go to Settings → Booking widget → the Sections tab.
- Each row shows a heading with a text box beside it. Type the name you'd rather use — for example, rename Highlights to Features.
- Leave a box blank to keep the default name.
- Click Save section names.
These names apply everywhere the section appears — the widget, the Preview customer view, and confirmation emails. Itinerary and Health & safety only show on experiences, so renaming them affects experiences only.
Generating Content with Dash AI
Every block has a Generate with Dash button. Dash writes a first draft for you based on the product name, description, and any blocks you've already filled in.
- Expand any block.
- Click Generate with Dash.
- A preview modal opens showing the suggested content.
- Click Apply to replace the block, or Discard to keep what you had.
Dash generations cost AI credits — see your balance under Settings → AI settings.
How Customers See It
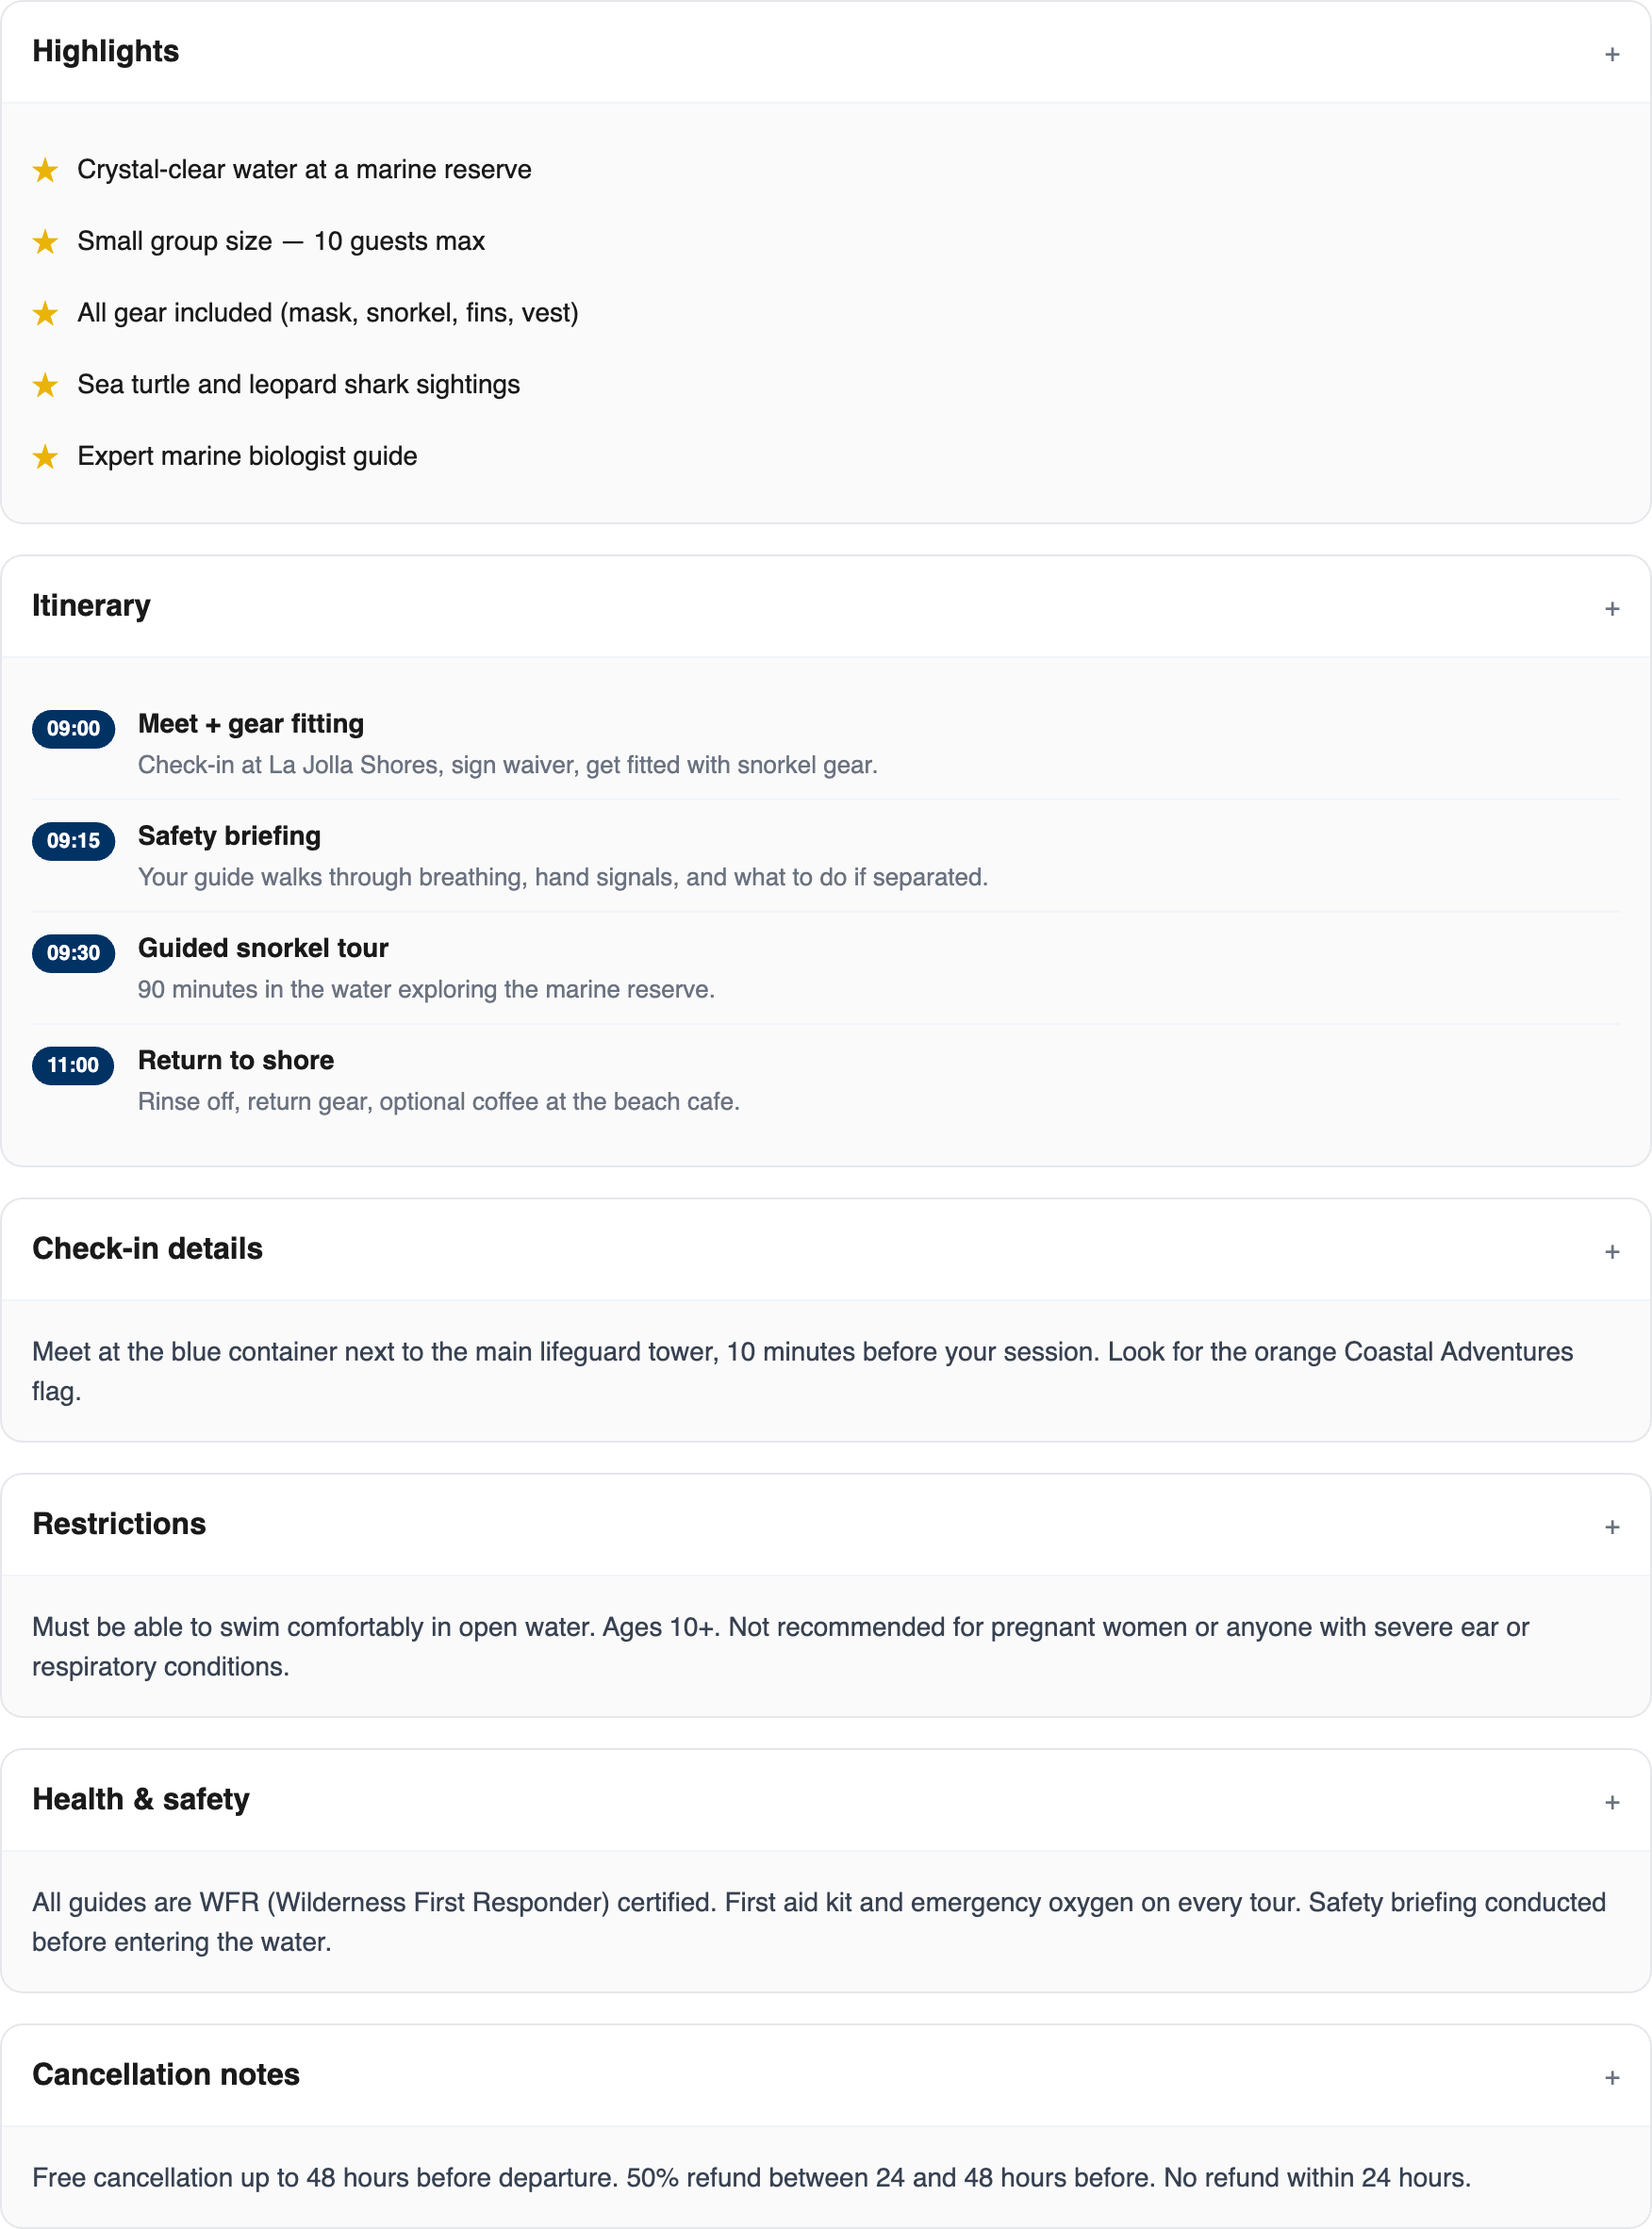
On the widget's item detail page, content blocks appear below the product description in the order you set in the editor — built-in blocks and your own sections together, exactly as you've dragged them. If you never reorder them, they fall back to a sensible default (What's Included, What's Not Included, Highlights, Itinerary, Check-in details, What to Bring, Restrictions, Health & Safety, Cancellation notes, then your own sections).
Each block renders with an icon and a headline. Empty blocks don't render at all.
Content Blocks on Confirmation & Reminder Emails
If you've filled in What to Bring and Check-in details, those two blocks also appear on:
- the booking confirmation email
- the booking reminder email
So customers don't have to dig through a PDF to find where to meet or what to pack. They appear in the same order you set in the editor.
Tips
- Keep Highlights short. Three to six bullets of 5–8 words each. The section is for skimming, not reading.
- Write the Itinerary in the customer's voice. "09:00 — Arrive and safety briefing" reads better than "Arrival / briefing".
- Check-in details beat an address. A what-to-look-for description ("blue container by the jetty, near the second life-ring") gets more customers to the right spot than a pin drop.
- Don't duplicate what's in your description. Content blocks replace the information you'd otherwise stuff into a long product description.