One-Time Sessions
One-time sessions let you add individual availability slots for an experience — a specific date, time, and capacity for a single occurrence. This is the manual approach to availability management and gives you full control over every session.
When to Use One-Time Sessions
One-time sessions work well when:
- Your experience runs on an irregular schedule that does not follow a repeating pattern.
- You want to add special one-off sessions (e.g. a holiday event or a private booking).
- You prefer to manage each session individually.
- You are running a limited or seasonal experience with only a few dates.
If your experience runs on a regular, repeating pattern, consider using Recurring Schedules instead.
Adding a One-Time Session
-
Navigate to the experience detail page by clicking the experience in the Experiences table.
-
Click the Availability tab.
-
Click the + Add session button at the top-right of the tab.
-
The Add availability sidebar slides in from the right. Set the following:
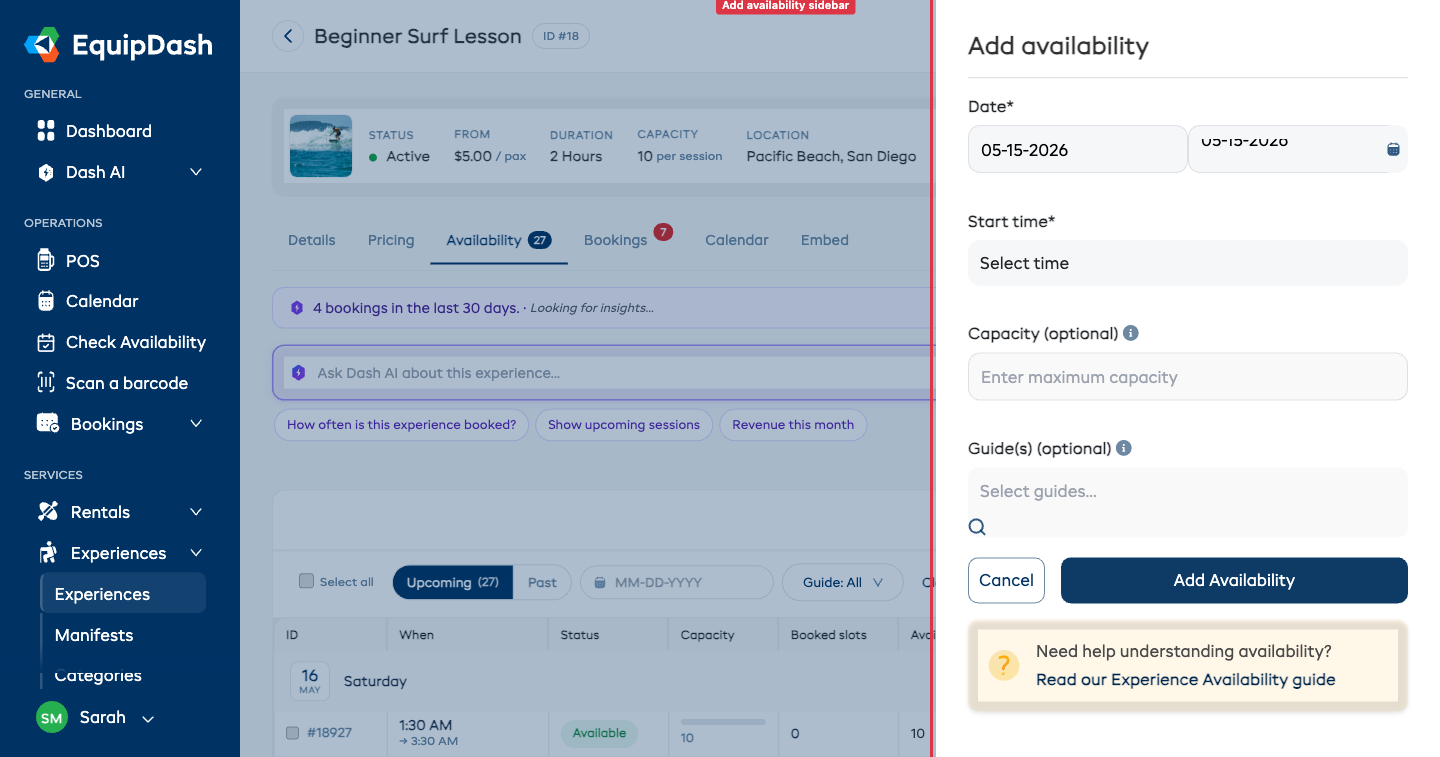
- Date — Choose the date for the session using the date picker.
- Start time — The session start time (e.g. 09:00, 14:30). The end time is derived automatically from the experience's duration.
- Capacity — Maximum number of participants for this session. Tick Unlimited capacity if you don't want a hard cap.
- Guide(s) (optional) — Click the search field to open the smart guide picker. Available guides surface first; partially-available and blocked guides show below with reasons. See Assigning Guides.
- Click Save to create the session.
The new session will appear in the Availability table, and customers will be able to book it through the booking widget.
Adding Multiple Sessions
To add several one-time sessions, repeat the process above for each session. Each session can have a different date, time, capacity, and set of guides.
If you find yourself adding many similar sessions, consider switching to the Recurring availability management method. You can always switch back to Manual later without losing existing sessions.
Editing a One-Time Session
- In the Availability table, find the session you want to change.
- Click the Edit icon on that row.
- Update the Date, Time, Capacity, or Guides as needed.
- Click Save.
You cannot reduce a session's capacity below the number of slots already booked. The form blocks the change and explains how many bookings are on that session — cancel the relevant bookings first, then reduce the capacity.
Bulk Actions
Tick the checkboxes on multiple session rows and the Action ▾ dropdown at the top-right of the tab unlocks four bulk operations: Edit capacity, Change time, Assign guides, and Delete. See Bulk Actions for the full walk-through of each.
Deleting a One-Time Session
Deleting a Single Session
- In the Availability table, click the Delete icon on the session row.
- A confirmation modal will appear showing the session details (time and date).
- Click Confirm to delete the session.
Bulk Deleting Sessions
If you need to remove multiple sessions at once:
- Tick the checkboxes on the sessions you want to delete in the Availability table.
- Click Action ▾ in the top-right and choose Delete.
- Confirm the deletion.
Sessions that have existing bookings on them are skipped automatically — the result toast lists which ones were skipped so you know to cancel or move those bookings first if you really want the session gone.
Capacity Notes
- If you set a Default Capacity on the experience, new sessions will not automatically use it when added manually. You set the capacity individually for each one-time session.
- Leave the capacity field blank if you do not want to limit participant numbers for a session.
- The Availability table shows Booked and Available columns so you can see at a glance how full each session is.