Tracking in Google Analytics and Meta
Your booking pages can report to the analytics accounts you already use. Paste your IDs once and every booking page sends the standard shopping steps to them:
| Step | Google Analytics / Tag Manager | Meta Pixel |
|---|---|---|
| Someone views a list of items | view_item_list | - |
| Someone opens an item | view_item | ViewContent |
| Something goes in the cart | add_to_cart | AddToCart |
| Checkout opens | begin_checkout | InitiateCheckout |
| A booking is made | purchase, with the value and booking number | Purchase |
Add your IDs
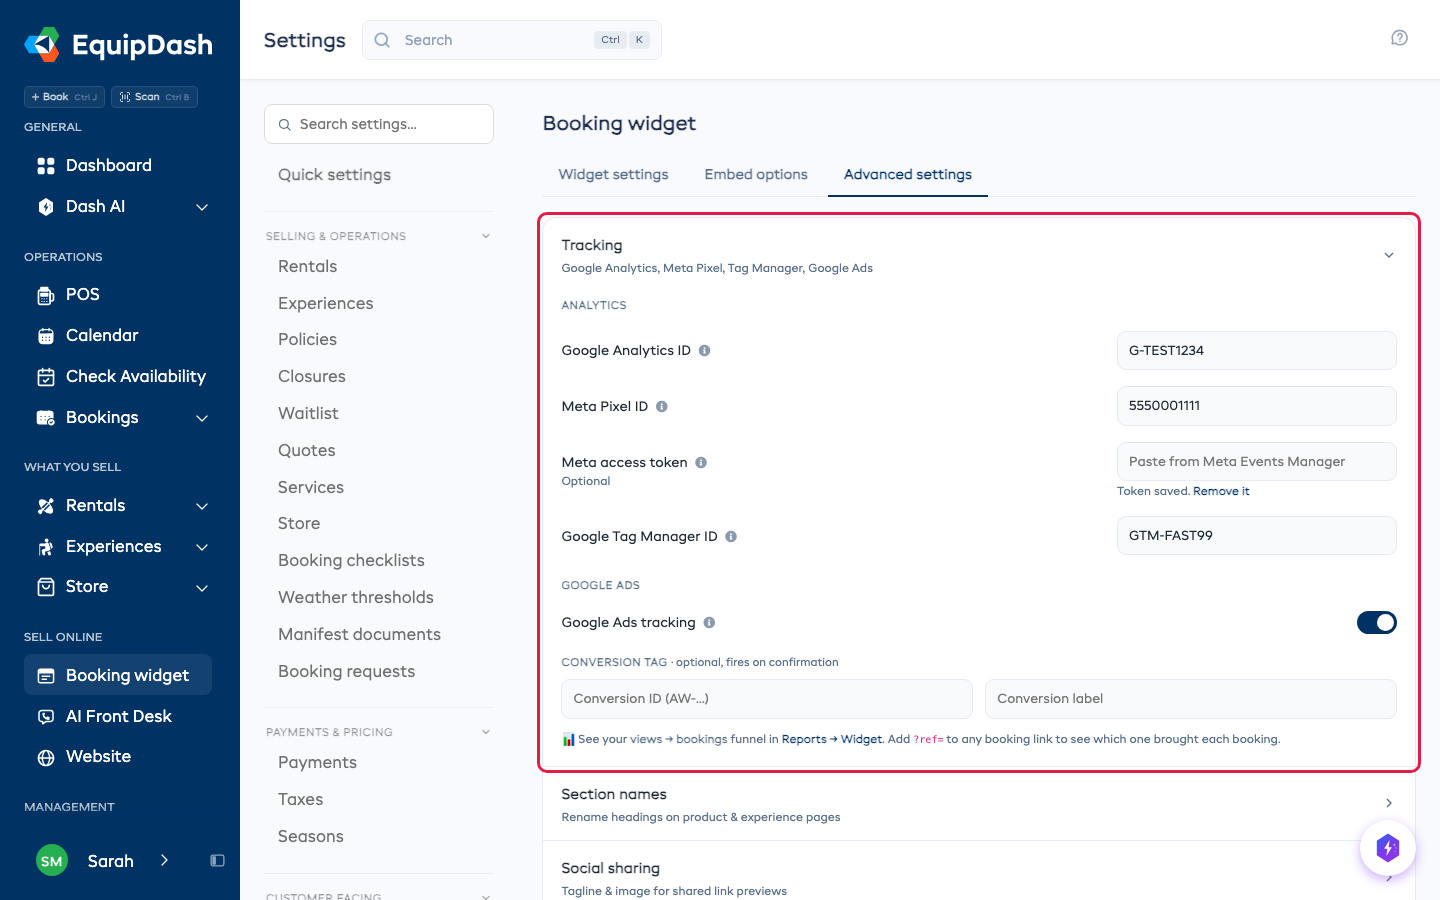
- Go to Settings > Booking widget.
- Open the Advanced settings tab, then Tracking.
- Paste any of these. Each one saves when you click away:
- Google Analytics ID - starts with
G-. Find it in Google Analytics under Admin > Data streams. - Meta Pixel ID - the number in Meta Events Manager.
- Meta access token (optional) - see Purchases from customers with ad blockers.
- Google Tag Manager ID - starts with
GTM-.
- Google Analytics ID - starts with
These IDs are used when a customer books on your EquipDash booking page itself, for example from a direct link.
When the widget is on your own website
If the widget sits on your website (an embed code or the floating button), the steps go to the analytics already on that page, so they show up next to the rest of your site's traffic. Nothing extra to set up: your site's Google tag, Tag Manager or Meta Pixel picks them up.
- With Tag Manager on your site, each step arrives in the data layer as an event with an
ecommerceobject, ready for a GA4 ecommerce tag. - With only the Google tag, each step is sent as a GA4 event.
- With the Meta Pixel, each step is sent as its Meta event.
If your site asks visitors for consent, the widget follows it. Google's consent mode and the Meta Pixel's own consent settings apply as usual. To hold everything back until a visitor agrees, add window.equipdashTrackingConsent = false; to your page, and set it to true once they accept.
Purchases from customers with ad blockers
Some customers block the Meta Pixel in their browser, so their bookings never reach your ads data. Paste a Meta access token and we also send each purchase to Meta from our side. Meta counts it once even when both arrive.
- In Meta Events Manager, open your pixel and go to Settings.
- Under Conversions API, click Generate access token and copy it.
- Paste it into Meta access token and click away. The field then says the token is saved; we never show it again.
To stop sending, click Remove it under the field.
Tag your links with ?ref=
Add ?ref= and a short name to any booking link or page with your widget, and the booking keeps it as its Link tag. Use a different tag for each place you share a link:
https://yourwebsite.com/book?ref=summer-flyer
https://app.equipdash.com/widget/your-slug?ref=hotel-concierge
- Letters, numbers, dashes, dots and underscores, up to 64 characters. Spaces become dashes and capitals become lowercase.
- The first tag a customer arrives with is the one that sticks.
- It works on every embed code and on the floating button, as well as on a plain link.
The tag shows as Link tag beside Source on the booking:
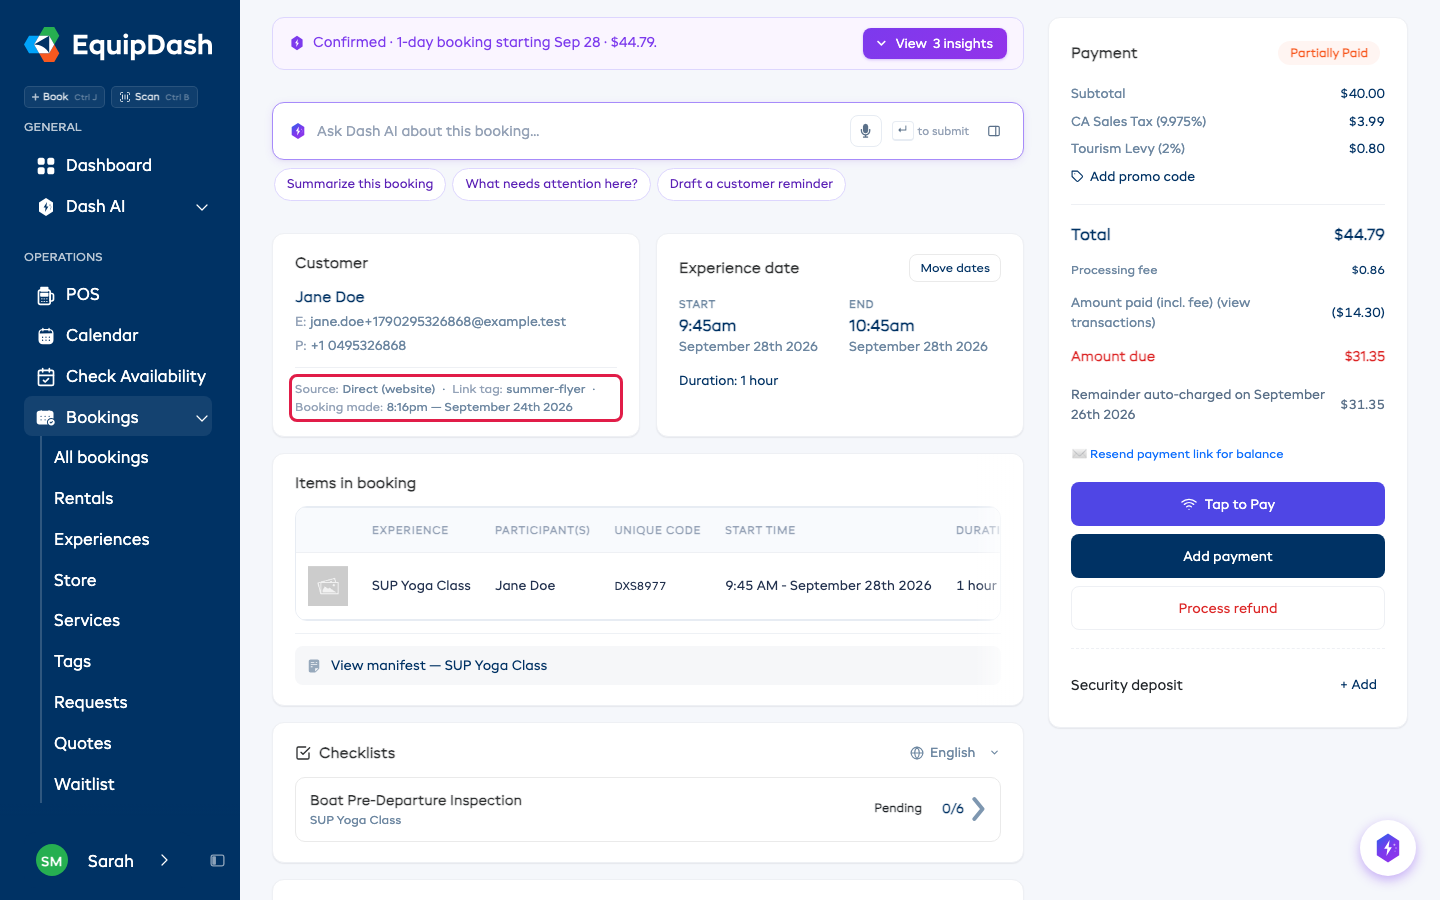
To see every booking from one tag, open Bookings > All, click Filters and pick it under Link tag. The Marketing report and its export have a Link tag column too.