Managing a Program Growth+This feature requires the Growth+ plan or higher
Open a program from Experiences → Programs and you get a workspace with everything about it in one place. Which tabs you see depends on what the program is:
| Tab | On a program | On a cohort |
|---|---|---|
| Overview | ✅ | ✅ |
| What's included | ✅ experiences only | ✅ experiences and dates |
| Bookings | — | ✅ |
| Participants | ✅ everyone across all cohorts | ✅ this cohort only |
| Cohorts | ✅ | only if it already has cohorts |
| Session manifests | — | ✅ |
Overview
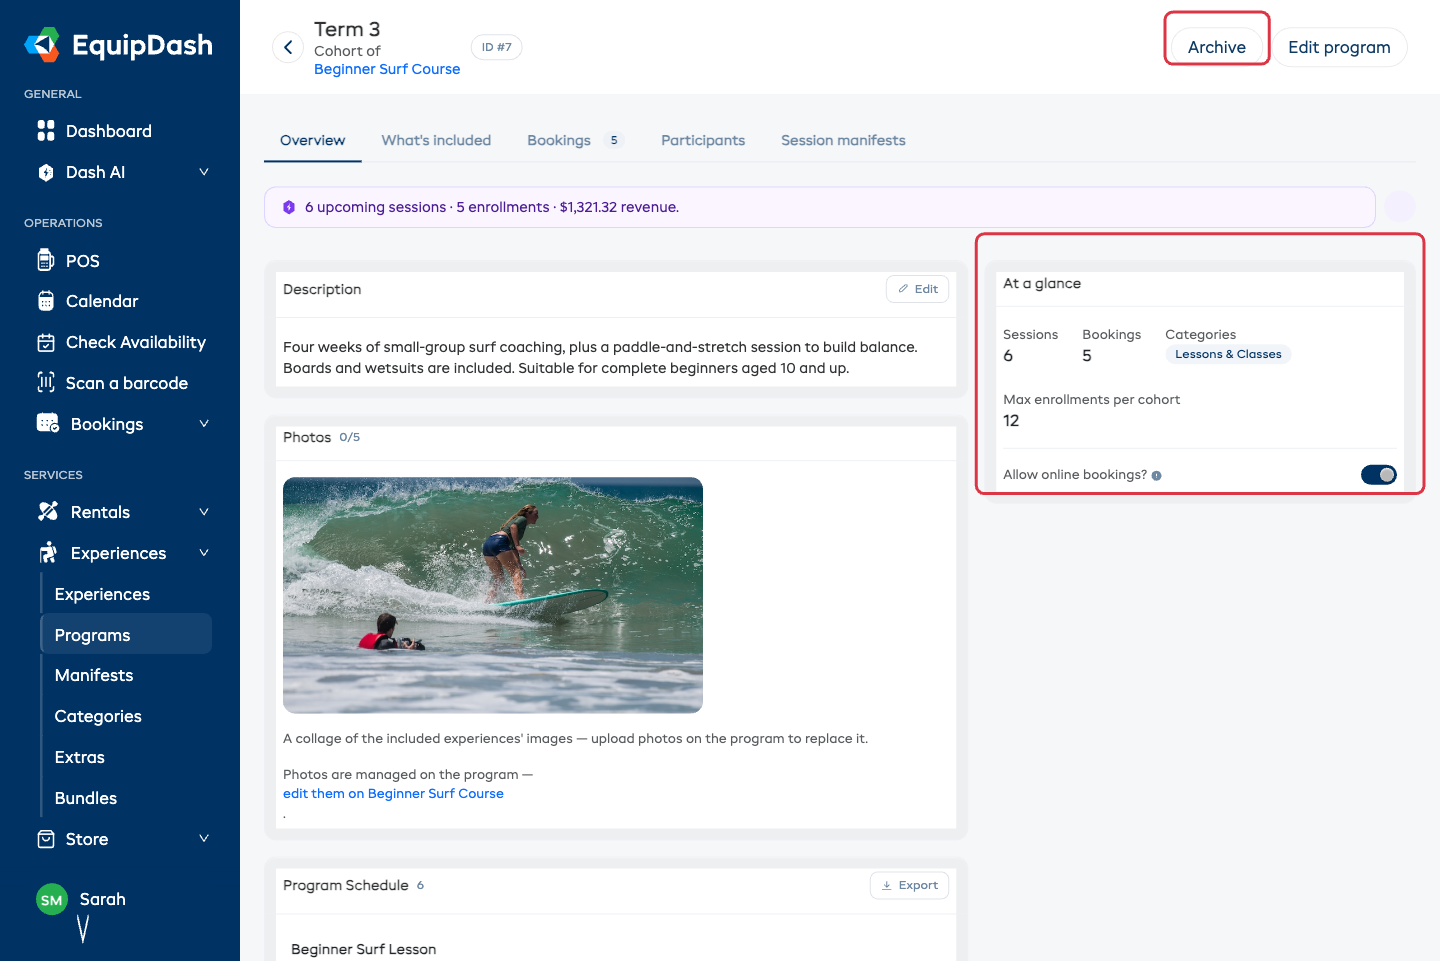
Description
Whatever you wrote when you created the program shows here. Click Edit on the Description card to change it in place — headings, bold, bullets — then click Save.
This is what customers read on the program's page on your booking site, so describe what they're signing up for: what's covered, what's provided, who it suits. If you skipped it in the New program panel, this is where to add it — see Creating a Program.
Photos
Up to 5 photos. Drag to reorder, click the star to set the main one, the crop icon to adjust framing, and the ✕ to remove.
Until you upload a photo, the program shows a collage of its included experiences' images — so a new program never looks empty. As soon as you add one photo, that photo takes over.
Photos live on the program. A cohort shows the program's photos and links straight to it, so you set them once and every cohort matches.
Program Schedule
The Program Schedule lists each included session in date order with its experience, date, and time. Sessions that have already run are grayed out and marked Already ran.
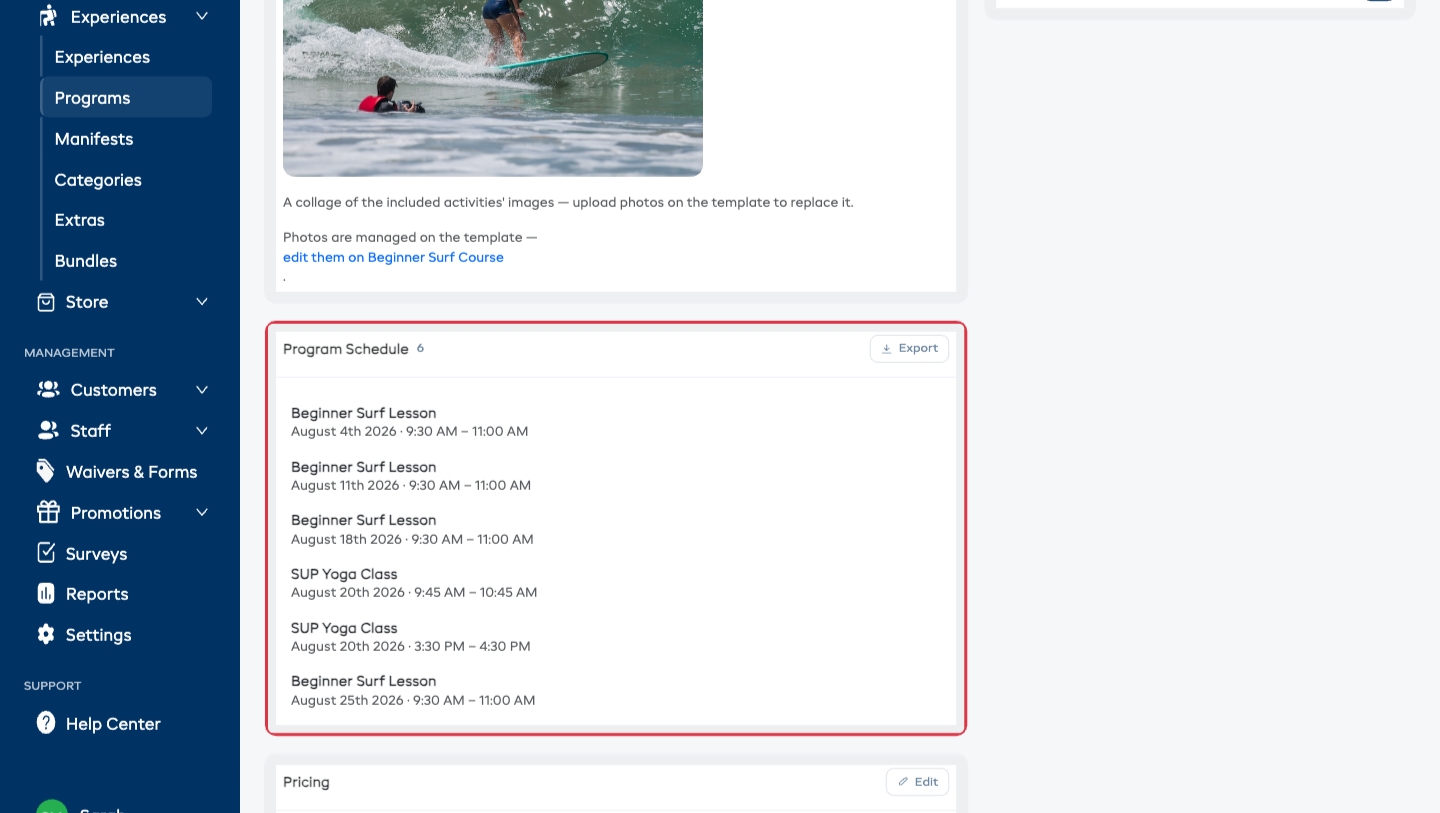
Export downloads it as a PDF — handy to email a parent or pin up in the shop.
A program itself has no schedule — its dates live on its cohorts, so each cohort has its own.
Pricing
A plain summary of how the program is priced. Click Edit on the card to change it right there — the same options as when you created it. See Creating a Program.
At a glance
The right-hand card: Sessions, Bookings, Categories, and Max enrollments per cohort if you've set one. Underneath sits a switch you can flip without opening anything:
- Allow online bookings? — whether customers can book it on your booking page. On a program this is the default every new cohort inherits.
If a cohort has no dates yet you'll see a reminder here with a link to the What's included tab.
What's included
This is where a program is actually built: which experiences are in it, and which of their dates it uses.
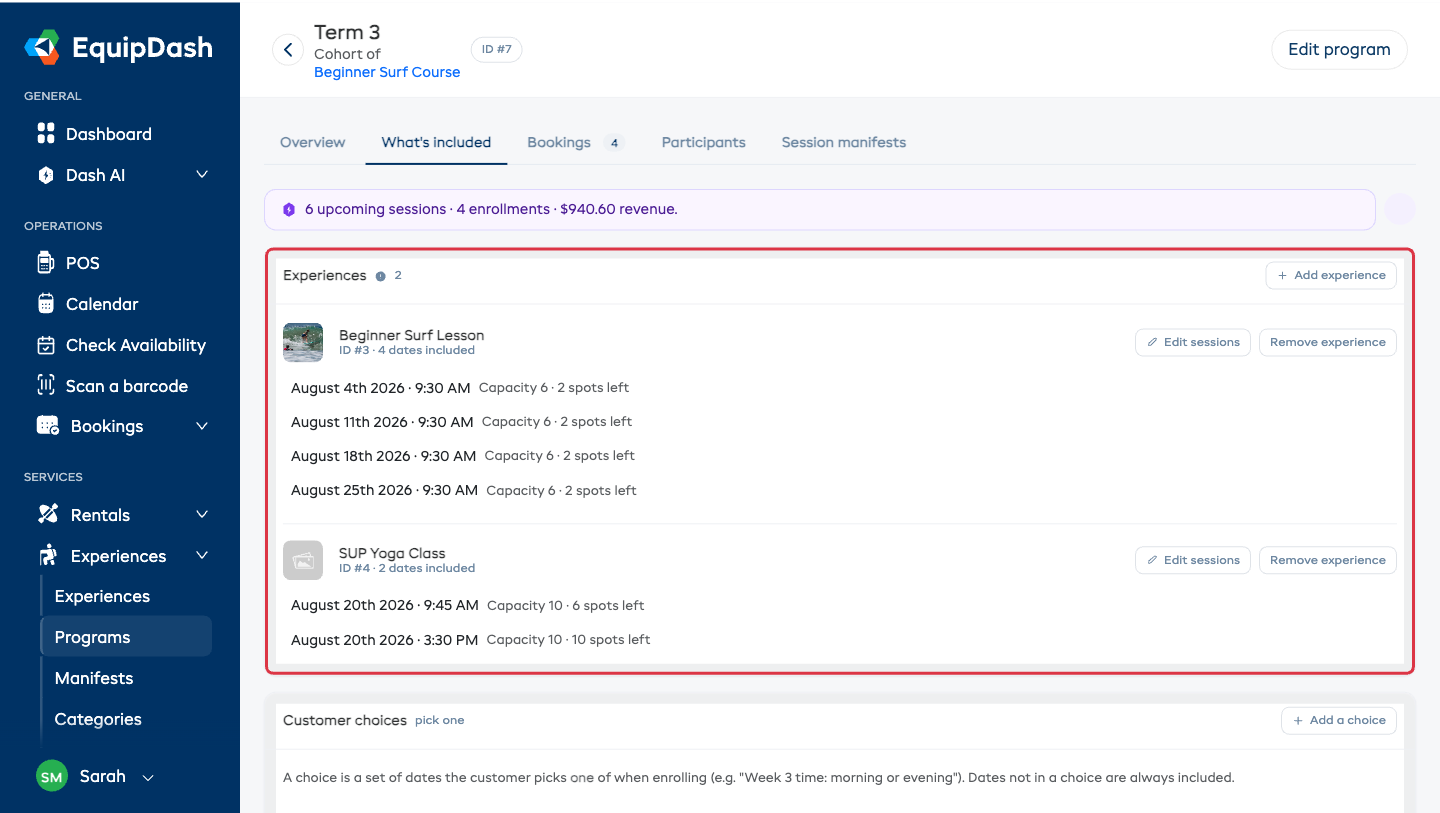
The Experiences card lists each included experience with only the dates that are in the program — not the activity's whole calendar. Each date shows its capacity and spots left, so you can see at a glance whether the program is filling up.
Adding dates
- Click Add sessions (or Edit sessions if it already has some) beside an experience.
- A panel opens with that experience's upcoming dates.
- Use the Dates filter to jump to a month, then tick the dates that belong in the program. Untick to remove one.
- Click Done.
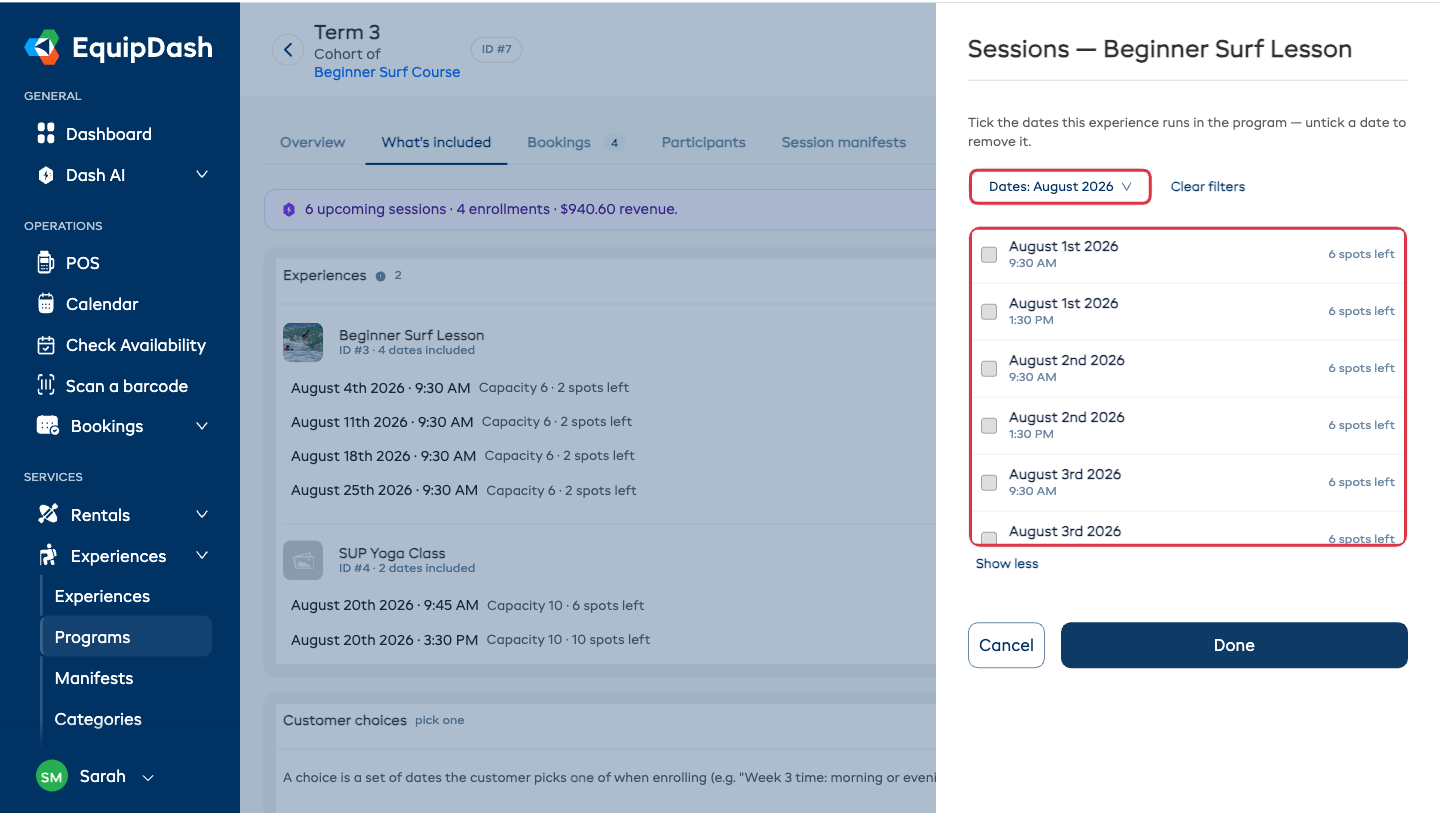
Each row shows the spots left, or Full when there are none. Check this before adding a date. Overlapping dates are disabled and explain which included session they clash with. The booking page checks capacity, closures, guides, and equipment when someone books.
Two dates can't overlap. The customer attends every session, so EquipDash refuses a date whose time clashes with one already in the program and tells you which one.
Adding and removing activities
Add experience in the card header opens a search panel — find an experience and click Add. It appears as a new section with no dates yet.
Remove experience takes the experience and its dates out of the program. If any of those dates already has bookings you'll be asked to cancel the bookings first — customers can't have a session pulled out from under them.
On a program, this tab manages the experiences only. There's no date picking — dates belong to each cohort.
Customer choices
Sometimes you want to offer alternatives: "week 3 runs Tuesday morning or Thursday evening — pick one."
The What's included tab keeps the two apart, because they mean opposite things:
- Every enrollment includes — the baseline. Everyone who signs up is booked onto all of these dates.
- Customer choices — the exception. One date instead of another.
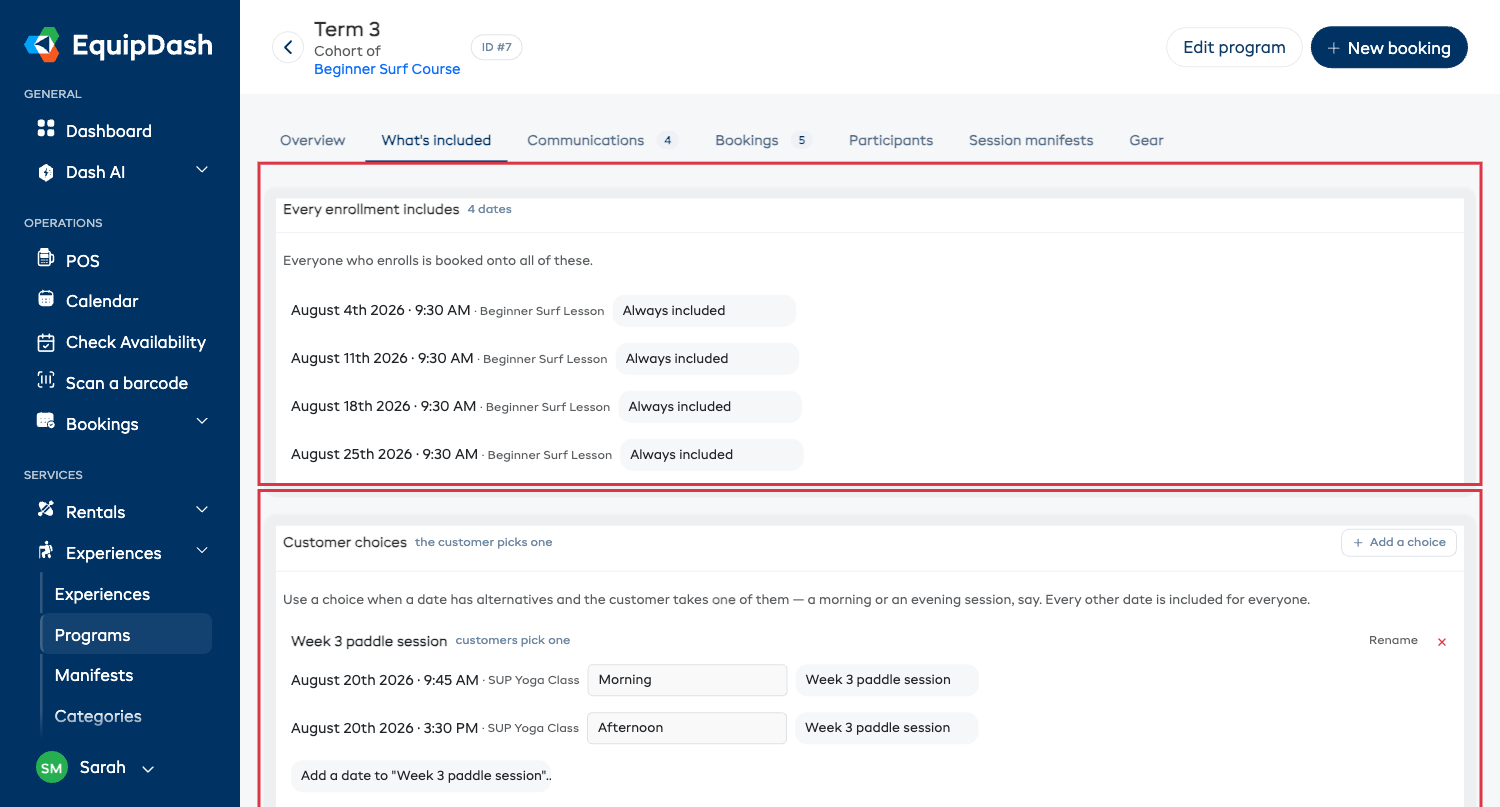
- Click Add a choice and name it after the thing the customer is picking — "Week 3 paddle session", "Saturday or Sunday". This name becomes the heading they see.
- Click Add.
- For each date that should be an option, use the dropdown beside it and assign it to the choice.
- Give each option a short label — "Morning", "Afternoon" — so the customer sees words, not just times.
Everything not in a choice stays under Every enrollment includes. When someone books, they pick exactly one option per choice and only that session is reserved.
If a cohort has no choices at all, the card says so — that's normal, and it means every date is included for everyone.
Use Rename to change a choice's heading, or the ✕ to remove it — its dates go back to Every enrollment includes.
Choices are set per cohort, since they're made of that cohort's dates.
Bookings
Every enrollment for the program: booking number, customer, when they booked, the total, and payment status.
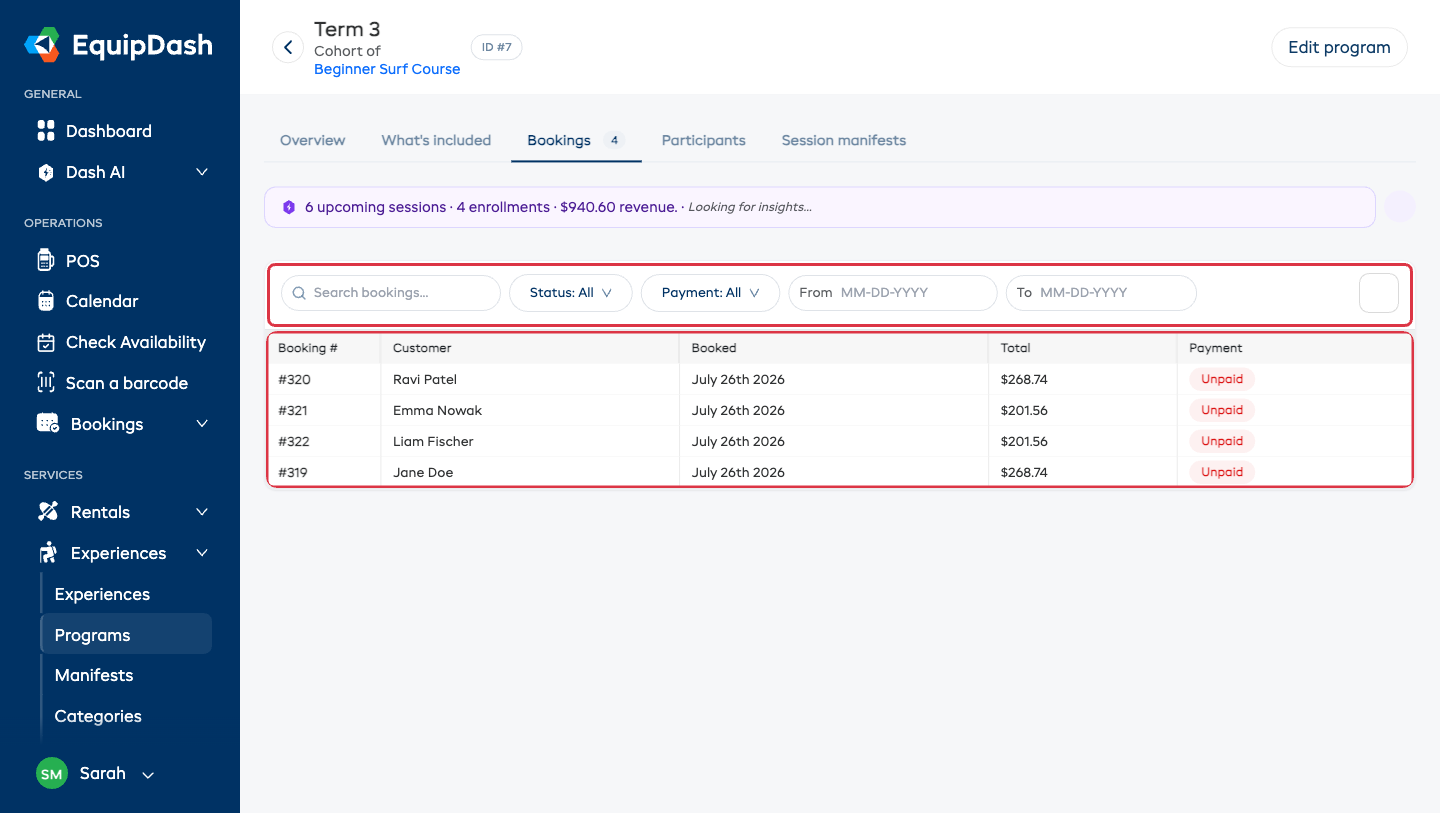
Search by name or booking number, and filter by Status, Payment, or a From/To date range. The gear at the end of the filter row lets you choose which columns to show. Click any row to open the full booking.
Participants
Everyone signed up, one row per person — useful when a booking covers a family or a group. It doubles as a small consent tracker for the roster.
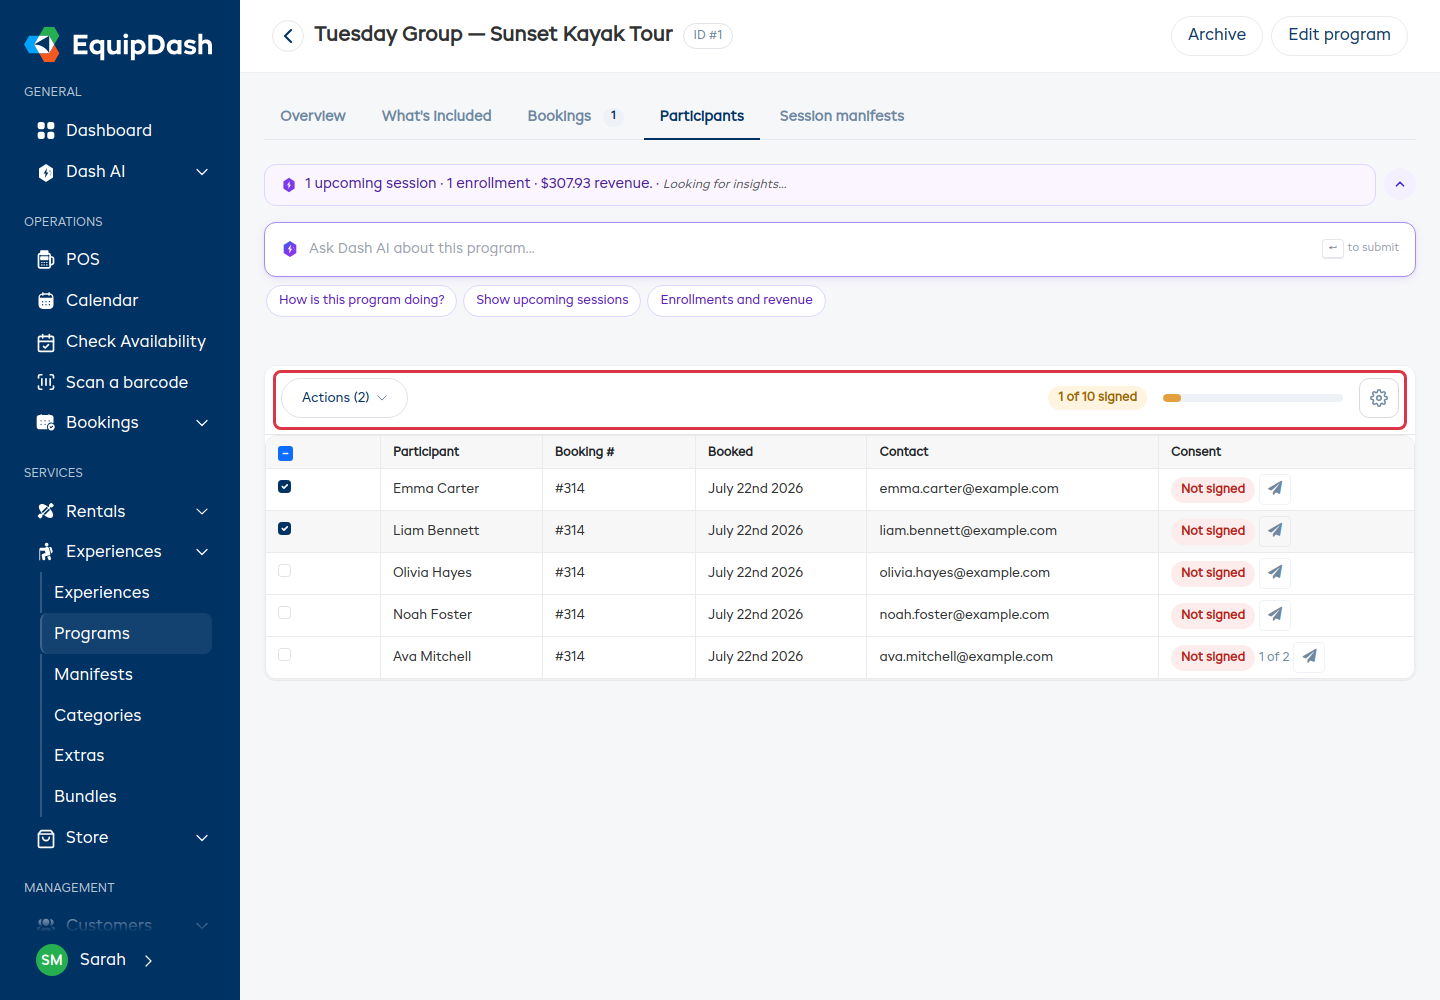
- A Consent column shows each person's status — Signed, Opened, not signed, or Not signed — with a button to chase anyone still outstanding.
- The toolbar shows how many of the whole roster have signed, with a progress bar beside it.
- Tick the rows you want and use Actions → Send reminders to chase several people in one go.
Click a column heading to sort, and use the gear to add or remove columns. Sending reminders needs the Manage waivers & forms permission. See Following One Person's Consent.
On a program, this tab pools every cohort's participants together with a Cohort column, so you can see everyone who's ever taken it.
Session manifests
One row per session — the same view as the Manifests page, filtered to this program.
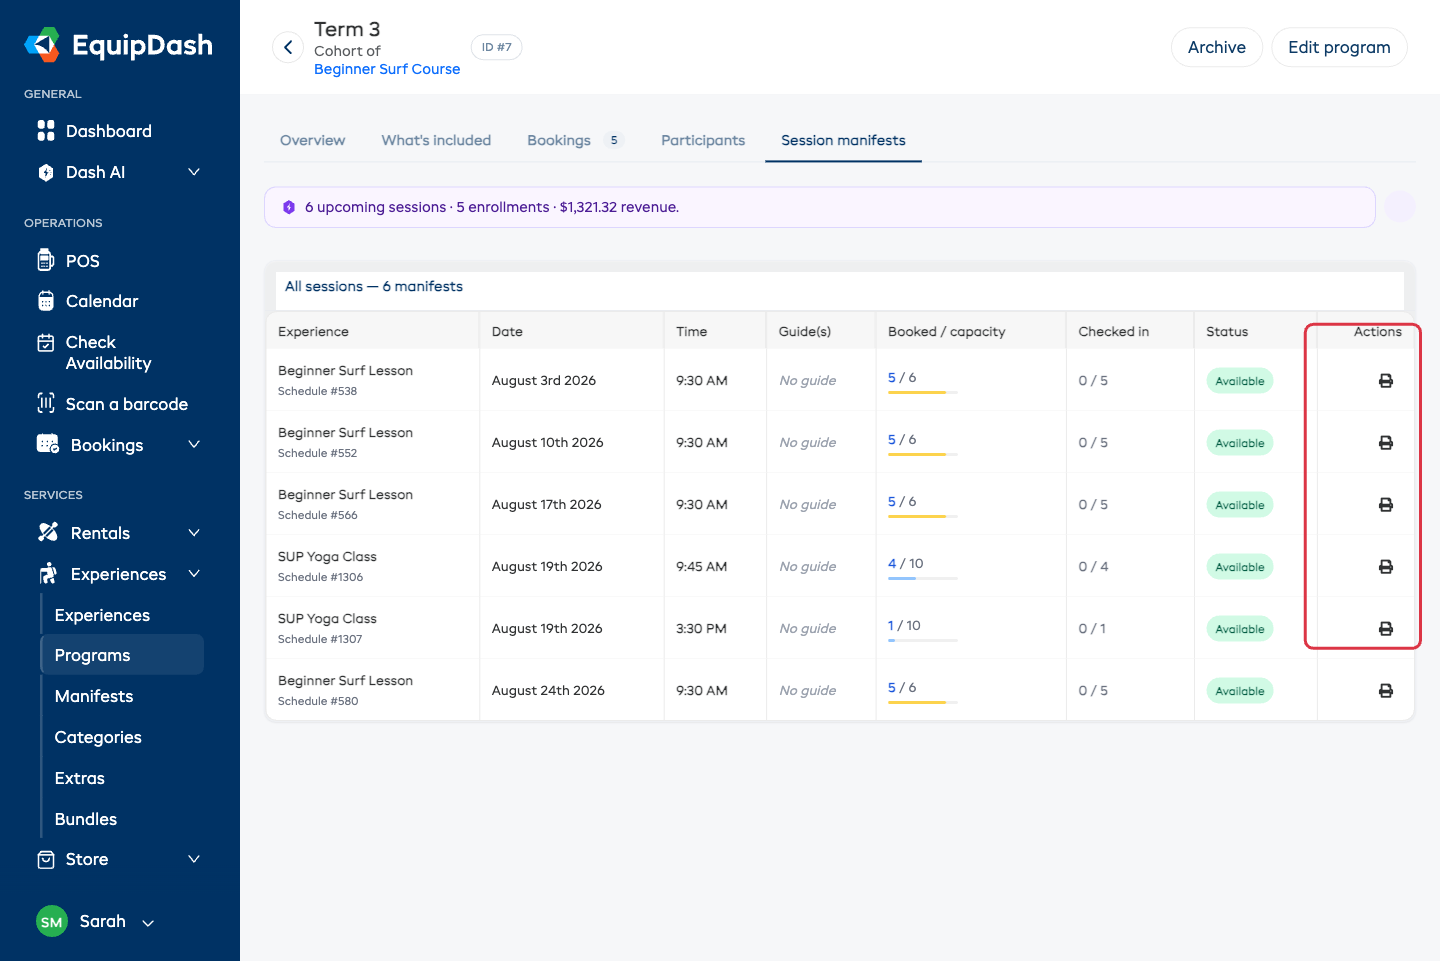
Each row shows the experience, date and time, assigned guides, how full it is, how many have checked in, and its status. Click a row to open that session's manifest and check people in.
Use the print icon at the end of a row to open that session's run sheet straight away — no need to go via the session's own page.
Editing everything at once
Edit program (top-right) opens a panel with the whole setup in one place: name, online bookings, description, categories, waiver, max enrollments per cohort, and pricing. Click Save program when done.
Max enrollments per cohort
Optional. Leave it blank and the program sells for as long as its sessions have space. Set a number and it stops at that many people in total, even if individual sessions still have room — useful when the room, the minibus, or your patience is the real limit.
Each cohort caps its own group. Set it on the program and every new cohort starts with the same number, which you can change per cohort.
Archiving, duplicating and cancelling
- Archive stops a program or cohort selling anywhere and hides it from the list. Existing bookings are untouched. It's on the program's own page, next to Edit program, and on the row in the Programs list. Once archived the button becomes Restore; in the list, switch the filter to Archived to find it again.
- Duplicate (from the Programs list) makes a standalone copy — same experiences, dates and pricing, no bookings — with online bookings turned off so you can finish it before it goes live.
- Cancel stops the program being booked and leaves existing bookings as they are. Use this when a run is called off; use Archive when you're simply done with it.