Creating a Program Growth+This feature requires the Growth+ plan or higher
Creating a program takes three short steps: the details, the experiences it's made of, and the dates it runs on. By the last step it's ready to sell.
Before you start, make sure the experiences you want to include already have dates on the calendar — those are the dates you'll pick from. See Setting Up Availability.
Step 1 — Details
- Click Experiences in the sidebar, then Programs.
- Click New program (top-right). A panel slides in from the right.
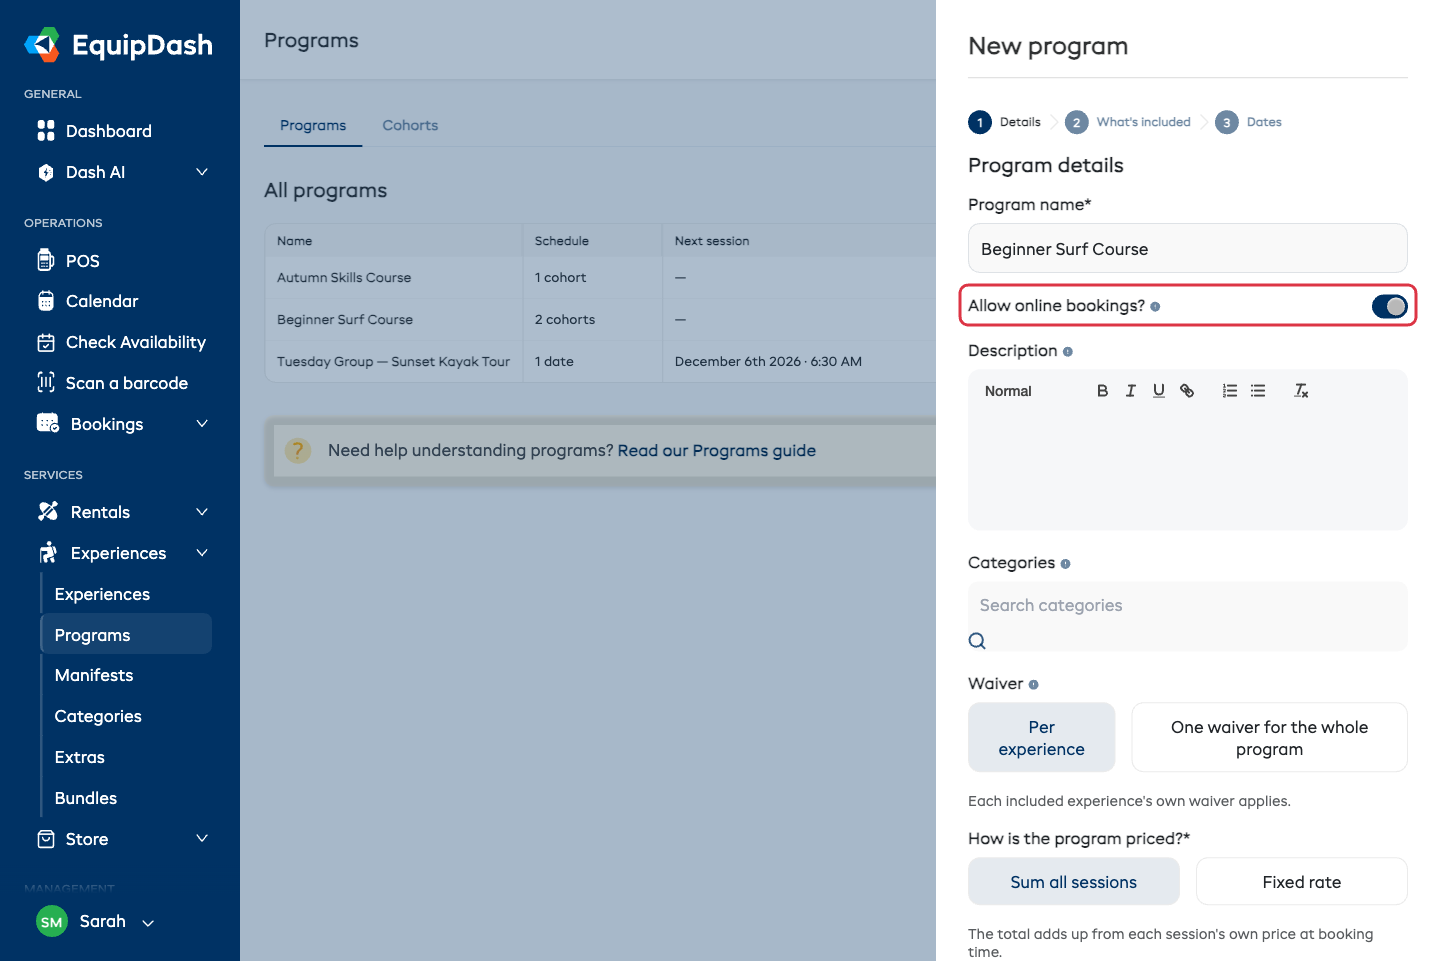
- Fill in the details:
Program name
What the customer will see — "Beginner Surf Course", "Summer Kids Camp", "Six-Week Pottery Course".
Name the program itself, not one particular run of it — "Beginner Surf Course", not "Beginner Surf Course Term 3". Each run gets its own name in step 3.
Allow online bookings?
Whether the program can be booked on your booking page.
This is the default every cohort starts with. You can change it per cohort, so a private group can be turned off while the public ones stay on.
Programs are always sellable at the counter in POS, whatever this switch says.
Description
What customers read on the program's page on your booking site — what's covered, what's provided, who it suits. Write it straight into the box, with the toolbar for headings, bold, and bullet lists.
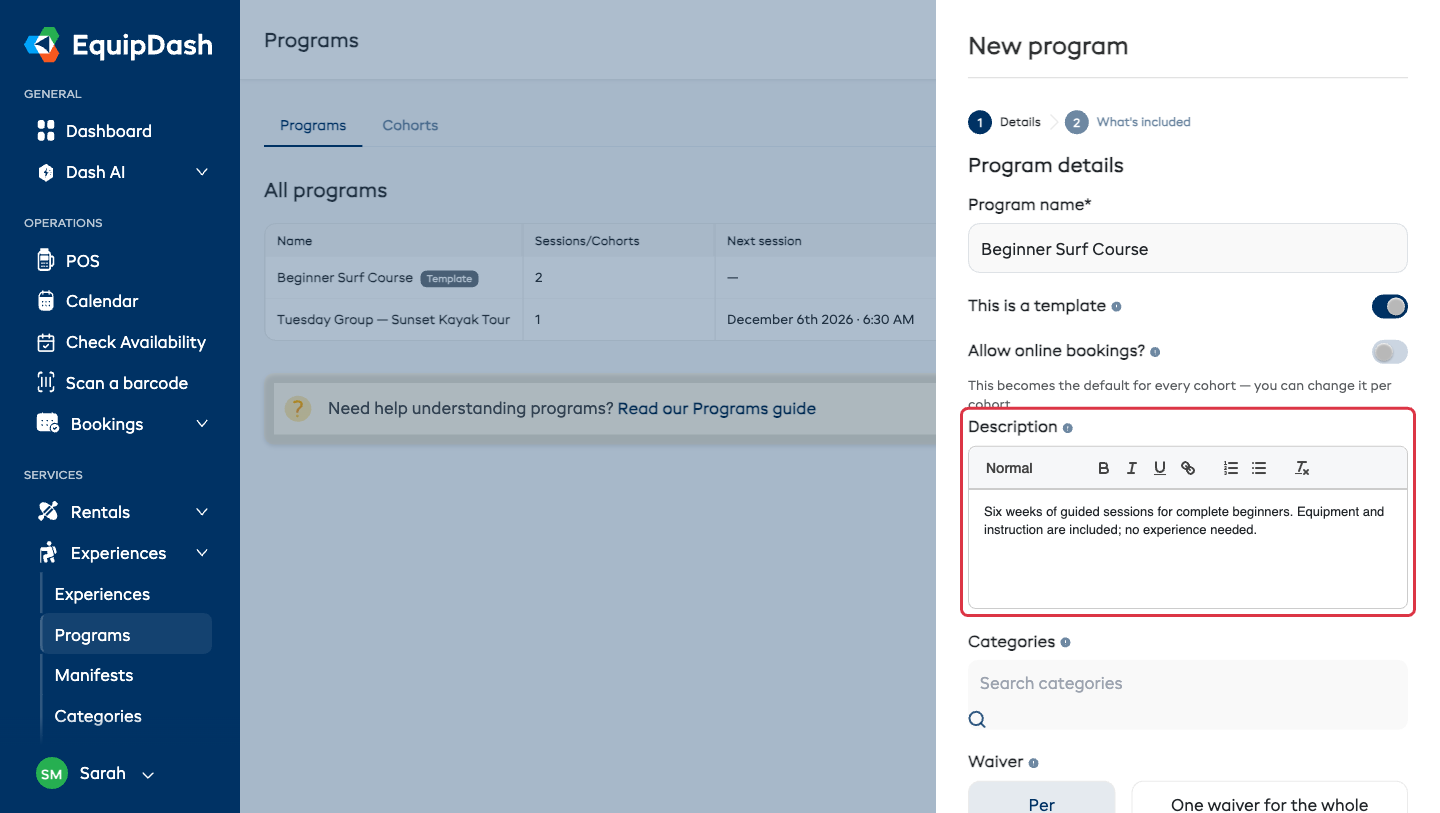
You can leave it blank and add it later on the program's Overview tab, where you can see it beside the photos and the schedule. That's also where you change it any time after — see Managing a Program.
Categories
Optional. File the program under one or more of your categories — the same categories your experiences use, so it appears alongside them when customers browse. Pick as many as fit; the first one is the main one.
Waiver
Choose how signatures work for this program:
- Per experience (default) — each included experience's own waiver applies, exactly as if the customer booked those experiences separately.
- One waiver for the whole program — pick a single published waiver and that's the only one participants sign, once, covering every session.
Only published waivers appear in the picker. See Waivers & Forms.
How is the program priced?
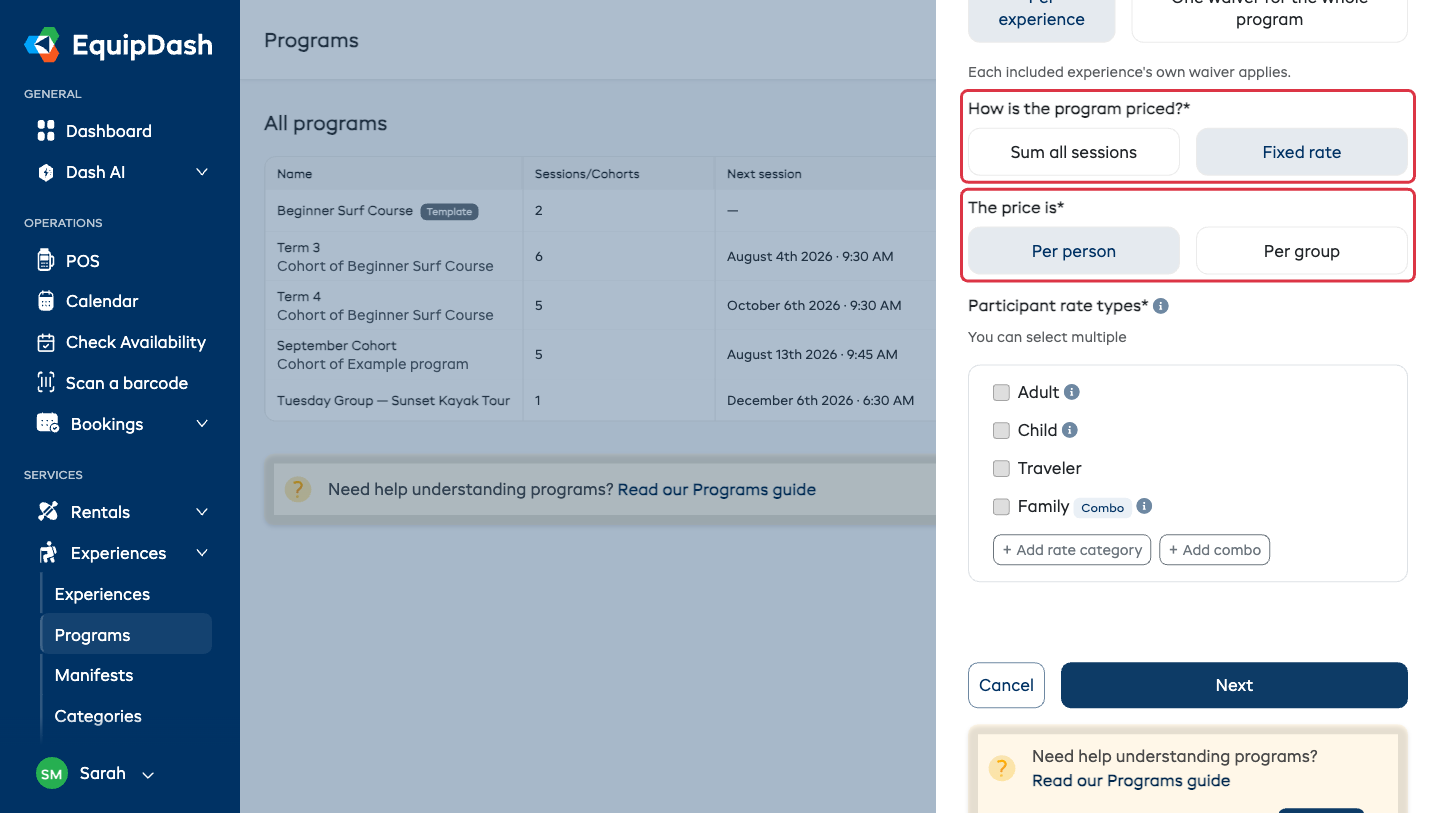
- Sum all sessions (default) — the total simply adds up each session's own price at booking time. Nothing else to set. Good when the program is "buy these five dates together".
- Fixed rate — one price for the whole program, regardless of what the individual sessions cost. Then choose:
- Per person — tick the rate types that apply (Adult, Child, Student…) and set a price per type for the whole program. A customer booking 2 adults and 1 child pays two adult prices plus one child price. If you haven't set up rate types, you get a single Price per person box instead.
- Per group — one flat price for the whole party, with a maximum group size and, optionally, a price per extra person beyond a number you include.
Rate types are shared with your experience pricing — set them up once and every program can use them. You can also add a new rate type right here with + Add rate category.
- Click Next.
Step 2 — What's included
Pick the experiences that make up the program. You can mix as many different experiences as you like.
- Type in Find an experience to search, then click one to add it.
- Added experiences appear under In this program — remove one with the bin icon.
- Click Next.
Step 3 — Dates
This is where the program becomes something customers can actually book.
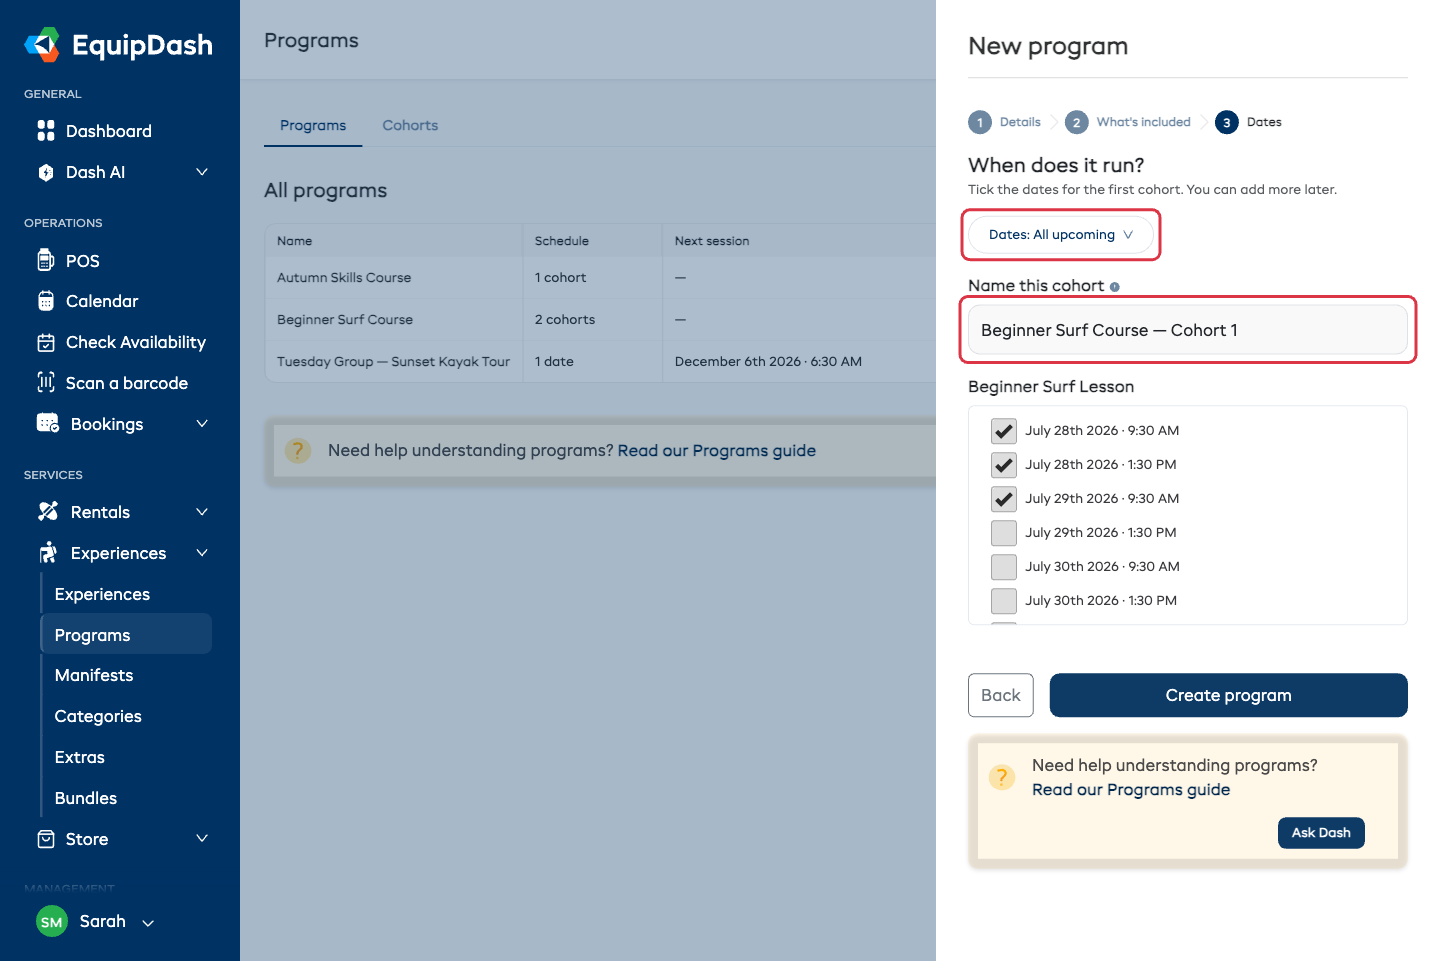
- Name this cohort. A cohort is one set of dates customers enroll in — "Term 3", "Spring 2026", "January Intake". It's prefilled with your program's name, so you can leave it as-is.
- Tick the dates. Every upcoming date of each experience you picked is listed underneath it. Tick the ones this run uses.
- Busy experience? Use Dates: All upcoming at the top to narrow the list to a single month.
- Click Create program.
You land on the program's Cohorts tab with your first cohort listed and its dates on it — ready to sell.
If you skip the dates
You can leave step 3 empty and click Create program anyway. The program is created without a cohort, and you add one later from its Cohorts tab — see Cohorts.
A program can't be booked until it has a cohort with at least one upcoming date.